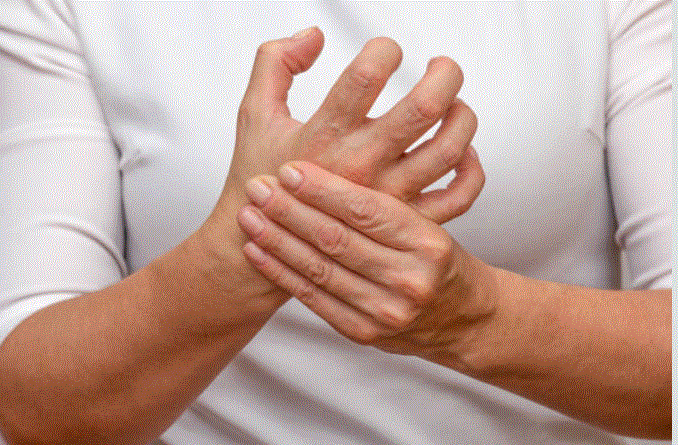
Carpal tunnel surgery is often a relief for those who have long suffered from tingling, numbness, and pain in the hand and wrist. However, what you do after carpal tunnel surgery is just as important as the procedure itself. Incorporating specific exercises after carpal tunnel surgery into your recovery plan can help restore mobility, reduce stiffness, and improve your hand strength more quickly.
Such as in this guide, we’ll cover the most effective post carpal tunnel surgery exercises, what to expect during recovery, and how to safely rebuild strength without setbacks.
Why Exercises Are Crucial After Carpal Tunnel Release
Such as After surgery, many patients experience stiffness, swelling, and limited wrist or finger mobility. While rest is necessary in the early stages, carpal tunnel rehab focuses on gradually restoring function and minimizing scar tissue formation. Without proper carpal tunnel physical therapy, you might delay your full recovery.
Benefits of exercising post-surgery include:
- Faster reduction in swelling
- Such as improved nerve function
- Restored grip strength and dexterity
- Prevention of stiffness and tendon adhesion
- Shortened overall recovery time
When to Start Exercises After Carpal Tunnel Surgery
Week 1–2: Rest and Gentle Movement
Such as in the first week or two after surgery, your hand is usually wrapped in a bandage or soft dressing. Focus on rest, managing pain, and gentle finger motion exercises to prevent stiffness.
Week 3–6: Begin Structured Rehab
Once your surgeon gives the green light (usually around 2–3 weeks), you can begin gentle wrist and finger exercises to start regaining flexibility and strength.
Week 6 and Beyond: Strengthening Phase
Such as this is when you transition to more advanced wrist exercises after carpal tunnel release, resistance training, and grip strengthening.
Top 10 Exercises After Carpal Tunnel Surgery
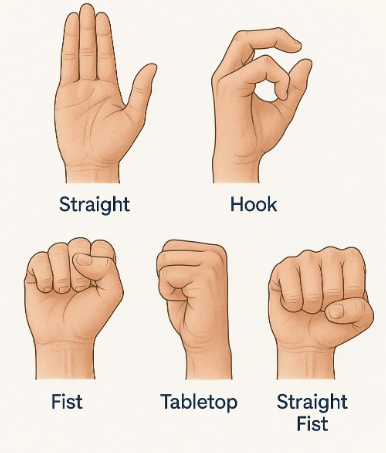
1. Tendon Gliding Exercises
Start: Week 1–2
Purpose:
Prevent stiffness, encourage tendon movement, reduce scar tissue formation.
How to Perform:
Perform each of the following five hand positions in sequence such as:
- Straight Hand: Hold your fingers and thumb straight and together.
- Hook Fist: Bend the top and middle joints of your fingers down, keeping the knuckles straight.
- Full Fist: Such as curl your fingers into a full fist with the thumb outside.
- Tabletop Position: Keep knuckles bent at 90 degrees while the other joints remain straight (like a tabletop).
- Straight Fist: Bend only the top two joints of your fingers, while knuckles stay straight.
Such as repeat the full sequence 10 times, 3 times per day.
Tips:
- Move slowly and deliberately.
- Such as do not force painful motions—stop if it causes sharp discomfort.
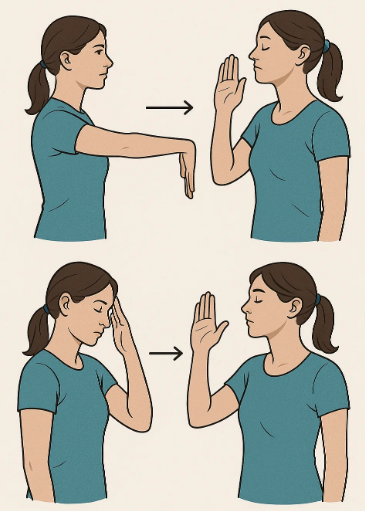
2. Nerve Gliding Exercises
Start: Week 2–3
Purpose:
Such as enhance median nerve mobility and decrease nerve adhesion around the surgical site.
Step-by-Step Instructions:
- Start with your arm at your side, elbow bent, palm facing you.
- Such as slowly straighten the arm forward while simultaneously extending your wrist and fingers back.
- Turn your palm upward while maintaining the extension.
- Gently tilt your head to the opposite shoulder (optional to stretch the nerve).
- Such as return slowly to the start position.
Perform 5–10 reps, twice daily.
Caution:
- Such as a slight tingling is okay—stop if you feel burning or strong pain.
- Do not overstretch; this is a glide, not a pull.
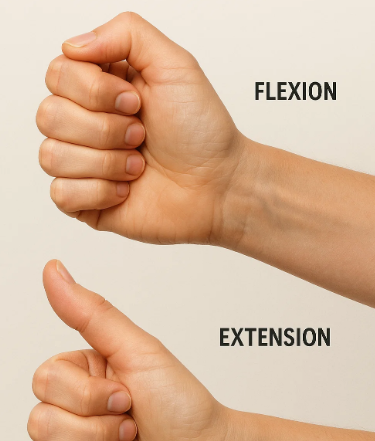
3. Wrist Flexion & Extension
Start: Week 3–6
Purpose:
Regain active range of motion in the wrist joint.
Steps:
- Sit at a table with your forearm resting on the surface, palm facing down and wrist hanging just off the edge.
- Such as slowly bend your wrist downward (flexion), then upward (extension), as far as is comfortable.
- Keep your movements smooth and controlled.
Repeat 10–15 times, 2–3 times per day.
Progression:
Such as add a 1–2 lb weight or soup can when the motion is pain-free.
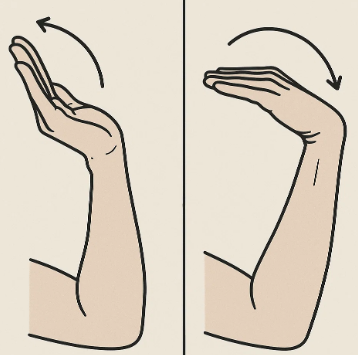
4. Wrist Rotations (Supination & Pronation)
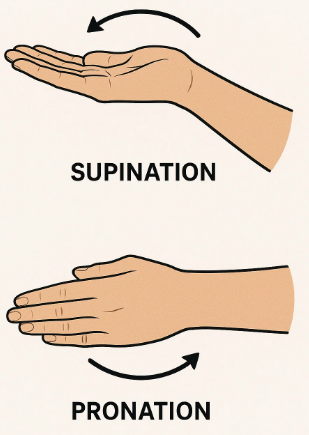
Start: Week 3–6
Purpose:
Restore forearm and wrist coordination.
How to Do It:
- Such as with your elbow bent at 90°, keep it close to your body.
- Rotate your palm upward (supination), then slowly rotate it downward (pronation).
- Keep the elbow stable and move only the forearm.
Do 2 sets of 10, twice a day.
Advanced Tip:
Such as use a hammer or weighted stick for added resistance once movement is easy.
5. Finger Opposition Drill
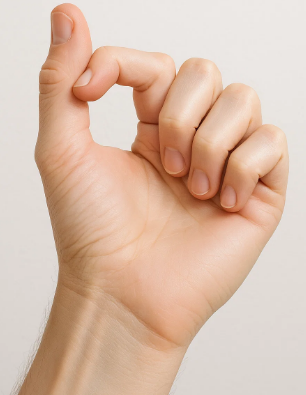
Start: Week 3–4
Purpose:
Such as improve coordination and fine motor control.
Steps:
- Start with fingers extended.
- Touch the tip of your thumb to the tip of each finger, one by one.
- Such as after that, slide your thumb down to the base of each finger.
- Hold each position for 5 seconds.
Repeat 10–12 times per hand.
Why it Works:
Such as vital for rebuilding functions like buttoning shirts, holding pens, and typing.
6. Wrist Flexor Stretch Using a Table
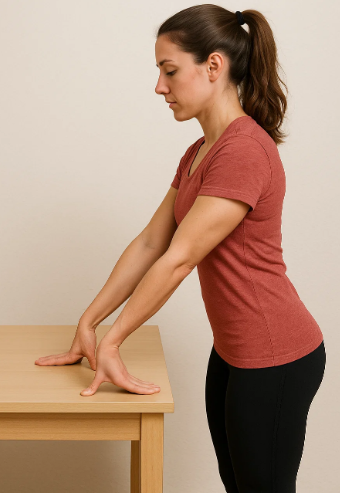
Start: Week 4+
Purpose:
Such as stretch tight muscles and tendons post-surgery.
Steps:
- Place your hand flat on a table with your fingers pointing toward your body.
- Such as slowly lean forward to stretch the underside of your forearm.
- Keep your elbow straight but not locked.
- Hold for 15–30 seconds.
Such as perform 3 stretches, 2–3 times per day.
Don’t Push Into Pain: Mild pulling is good; sharp pain is not.
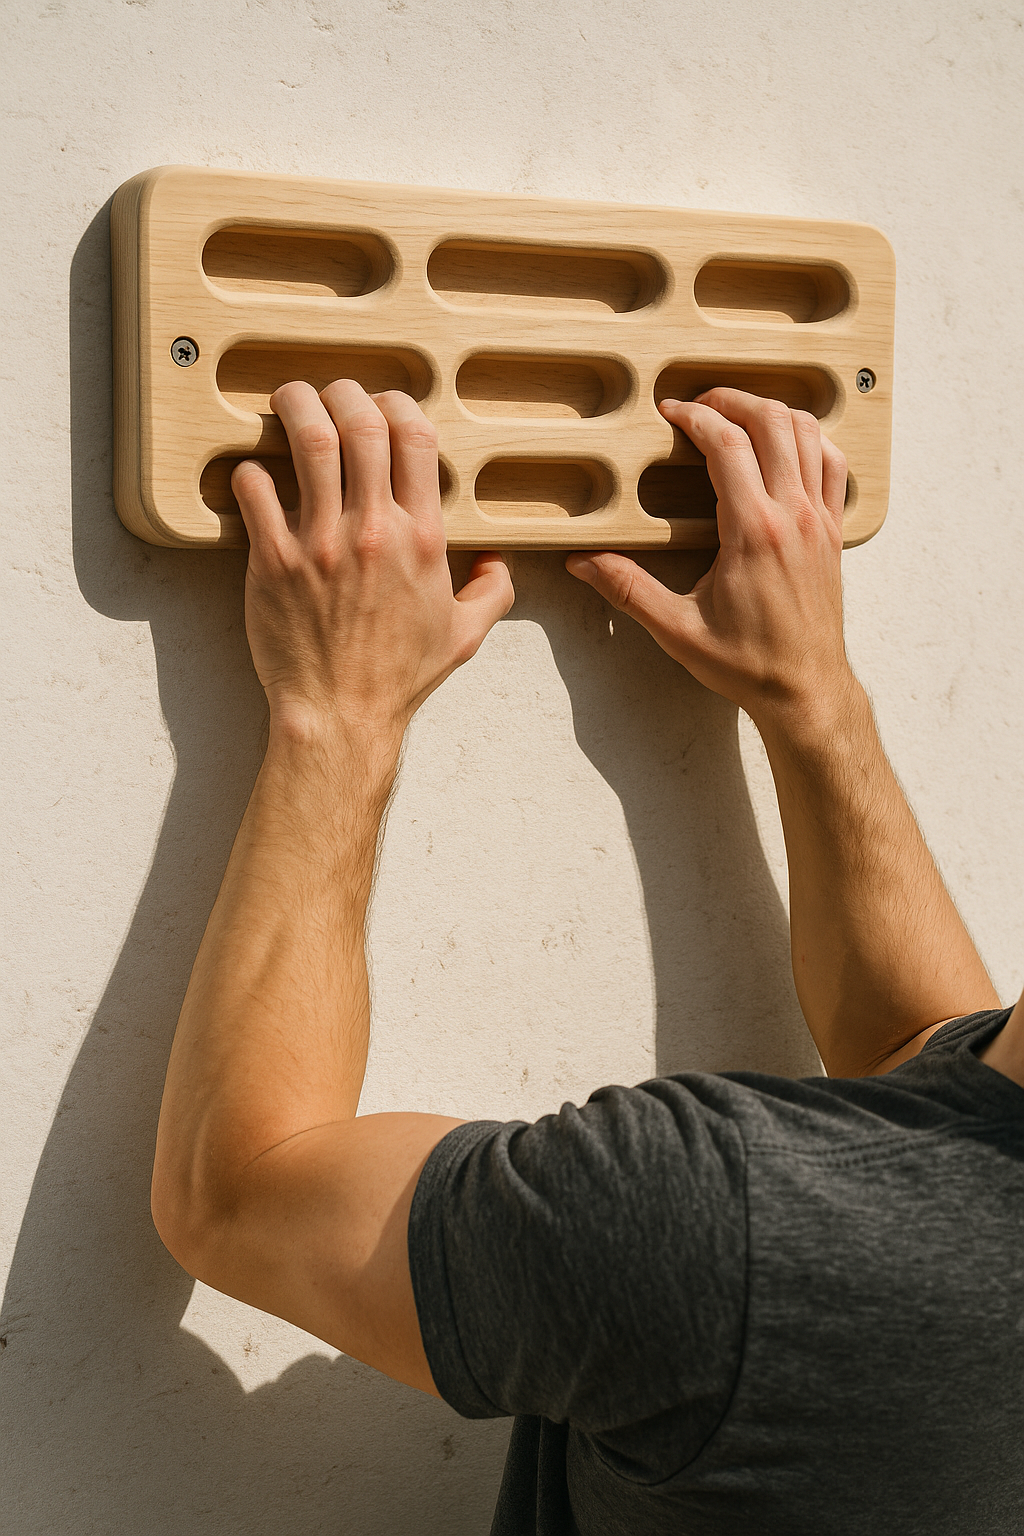
7. Therapy Putty or Squeeze Ball Exercises
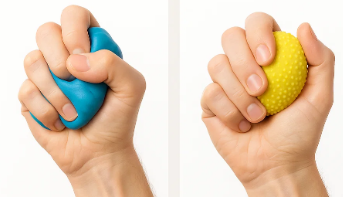
Start: Week 6 and beyond
Purpose:
Such as strengthen grip, improve blood circulation, and rebuild hand muscles.
Steps:
- Hold a soft stress ball or therapy putty in your palm.
- Such as slowly squeeze using your fingers and thumb together.
- Hold the squeeze for 3–5 seconds, then release.
Such as do 2 sets of 15 reps, once or twice daily.
Upgrade:
Move to medium-firm resistance once soft becomes easy.
8. Rubber Band Finger Extension
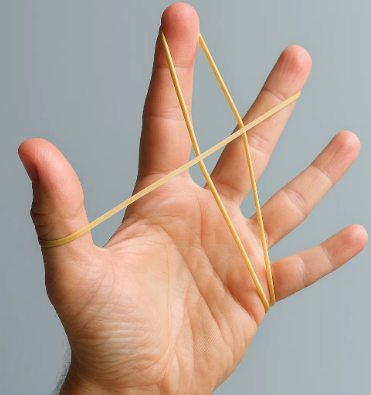
Start: Week 6+
Purpose:
Such as strengthen the finger extensors (often neglected during healing).
Instructions:
- Place a rubber band around your fingers and thumb.
- Such as stretch your fingers outward against resistance.
- Hold for 2 seconds, then release.
Perform 2–3 sets of 15 reps, 1–2 times daily.
Tip:
Such as you can use specialized therapy bands for controlled resistance.
9. Thumb Flexion & Extension
Start: Week 6+
Purpose:
Improve thumb mobility and gripping capacity.
Steps:
- Such as start with hand open.
- Slowly move your thumb across your palm to touch the base of your pinky.
- Extend the thumb back out to the side.
Repeat 10–15 times, 2 times daily.
Goal:
Such as to improve tasks like writing, lifting objects, and pinching.
10. Towel Wringing Exercise (Functional Strength)
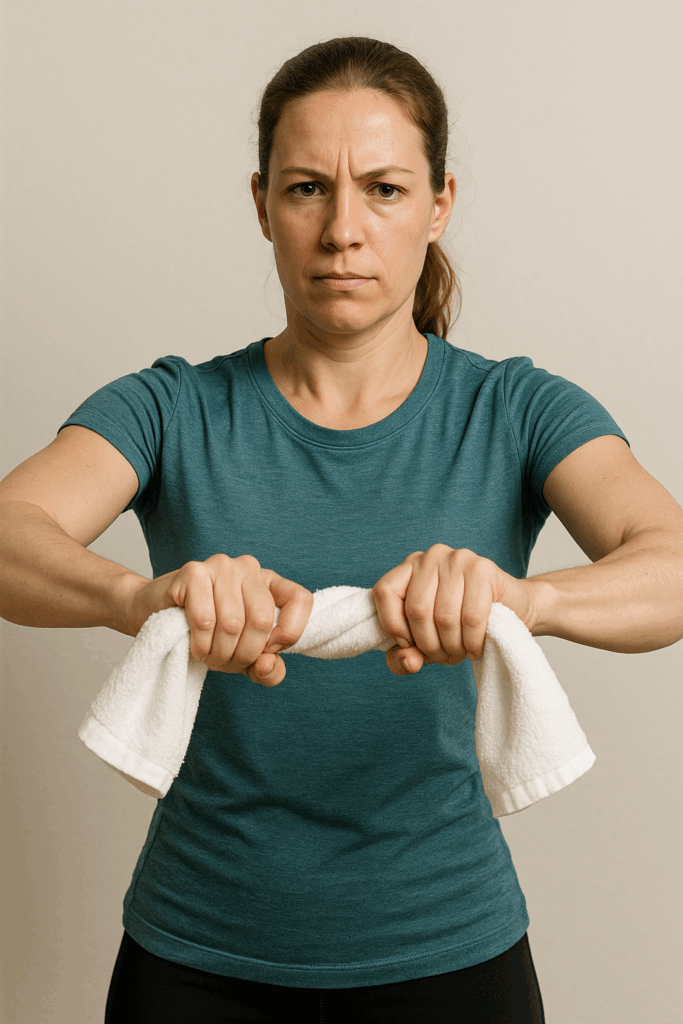
Start: Week 6+
Purpose:
Restore rotational wrist strength and simulate real-life hand use.
Instructions:
- Such as hold a dry towel with both hands.
- Twist it as if you are wringing out water—one hand forward, the other back.
- Reverse the direction after 5–6 wrings.
Such as do 10 reps, 2–3 times per day.
Progression:
Use a slightly damp towel for added resistance.
How to Structure Your Daily Routine
Morning:
- Tendon glides
- Nerve glides
- Wrist rotations
Afternoon:
- Wrist flexion/extension
- Finger opposition
- Thumb drills
Evening:
- Rubber band extensions
- Towel wringing
- Squeeze ball strengthening
Tips for Safe Recovery After Carpal Tunnel Surgery
- Listen to your body – pain is a sign to stop or slow down.
- Such as avoid lifting heavy items in the early weeks.
- Elevate your hand when possible to reduce swelling.
- Don’t rush the process — nerves heal slowly.
- Such as work with a physical therapist if available, especially for stubborn stiffness.
Common Mistakes to Avoid During Carpal Tunnel Rehab
- Starting too soon with strengthening exercises
- Such as neglecting the fingers while focusing only on the wrist
- Ignoring persistent pain or swelling
- Skipping exercises once initial relief appears
- Such as failing to follow up with your surgeon or therapist
FAQs: Exercises and Recovery After Carpal Tunnel Surgery
Q: How long does it take to fully recover from carpal tunnel surgery?
A: Such as ,most people recover in 6–12 weeks, though full nerve healing may take 6–12 months in severe cases.
Q: Can I do yoga or weightlifting after carpal tunnel surgery?
A: Eventually, yes. Wait at least 6–8 weeks and start with light resistance. Avoid strain on the wrist until cleared by your doctor.
Q: What if I don’t do exercises after surgery?
A: Without proper movement and stretching, you risk prolonged stiffness, poor function, and possible recurrence of symptoms.
Final Thoughts: Stay Consistent, Stay Patient
The journey to full function after carpal tunnel surgery is a gradual process, but with the right post-surgery exercises, you can regain strength and mobility in your hand. Make sure to stay consistent, follow medical advice, and adjust intensity as needed.
If your symptoms persist or worsen, consult a certified hand therapist or your surgeon. With dedication to your carpal tunnel rehab plan, you’ll be back to normal activities — pain-free and stronger — in no time.